The Writing Studio: Gaskets and Flanges and Errors, Oh My!
 And so it goes…another day of trial and error, another day of small successes and frustrations. It’s all part of the deal, and nobody said this would be easy. At the end of the day, it still feels good to be able to say that progress was made and new skills acquired. Some of today’s lessons? That hot glue gun glue dries a lot faster than the packaging says. That when working with bug guard, the trick is to adhere it to the screen frame flanges well enough that it’ll do the job, but not so firmly that it can’t be ripped off or easily adjusted if needed. Likewise, the third white thread on every piece of bug guard that’s cut needs to be pre-loosened and not pressed into the hot glue so that later it can be un-threaded.
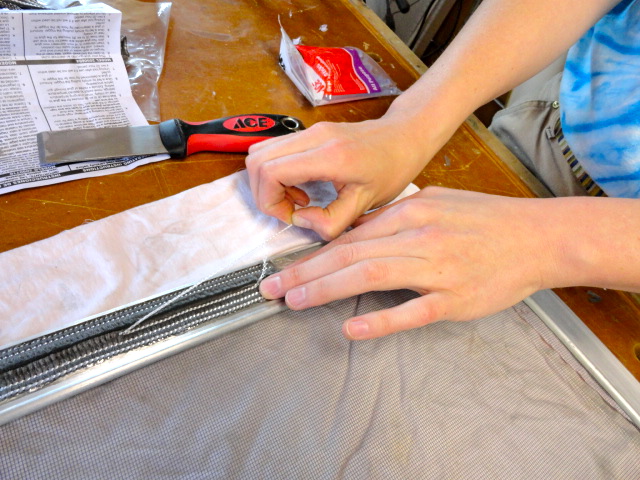
Say what? Here’s the photo (at right). The grey fuzzy stuff is bug guard and it’s basically two strips of synthetic fuzz that join together over the opening in the screen frame so that the armature can go through (and allow someone on the inside of the trailer to open the windows on the outside) but the bugs can’t get in. We’ve got 8 windows with two openings each, requiring 4 pieces of 10″ bug guard per screen…that’s 32 pieces glue gunned, pressed, un-threaded, and appropriately admired. (Note: the “un-threading” lets the bug guard fray, which is necessary over the opening in the screen flange.)
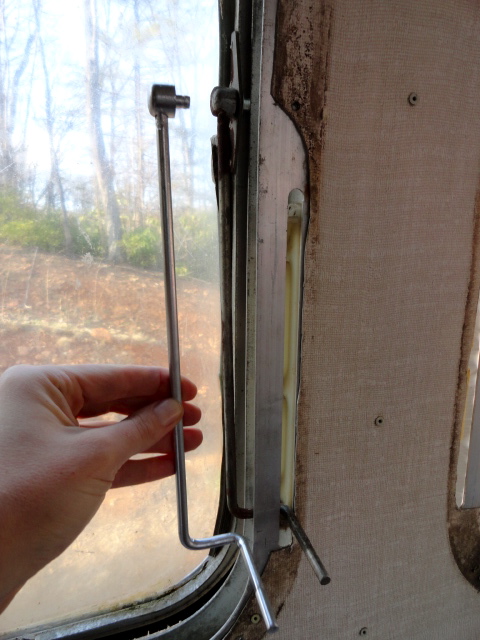
We also learned how to apply gasket (or weather stripping, as some sites call it) to the windows and side access portals for the Airstream. The first strip went on in a painful disaster I don’t care to recount. But the second and third strips went on without a fuss and tomorrow we may just be able to say we have 1 window–screen, frames, armature, and all–fully fixed and reassembled. Maybe. Here’s a shot of a living room window with its new weather stripping nicely adhered to the sparkling clean (and hard worked for) window flanges. I’ll spare readers the details of what it was like removing 42-year-old weather stripping, de-gunking the old adhesive, and finally, using steel wool and polish and lacquer to prepare the surface for the new stuff you see here.

The surprise of the day? In removing one of the side access panels to replace the weather stripping, the lock handle accidentally slipped into place. No problem, you might think. Just unlock it. Oh, if only it were that easy. Who knows if and when and where and how that key ever existed…but a replacement is $40 and that’s just for one side panel (not the others, and not the front door, either). We might do better disassembling the entire lock mechanism itself. And so it goes…one thing leading to another to another to another…Meantime, I’m officially in love with Rust-Stop “aluminum shine” spray paint, which cleaned up this rusted (then sanded and prepped) window armature with pleasing before and after results:
Always end on a good note!
